Installing Sopphie
Before you can use your brand new WordPress theme, you need to install it. For this, you need a working WordPress installation. If you don’t have one, please refer to the “Introduction” page.
- Check to ensure that your web host has the minimum requirements to run WordPress.
- Always make sure they are running the latest version of WordPress.
- You can download the latest release of WordPress from the official WordPress website.
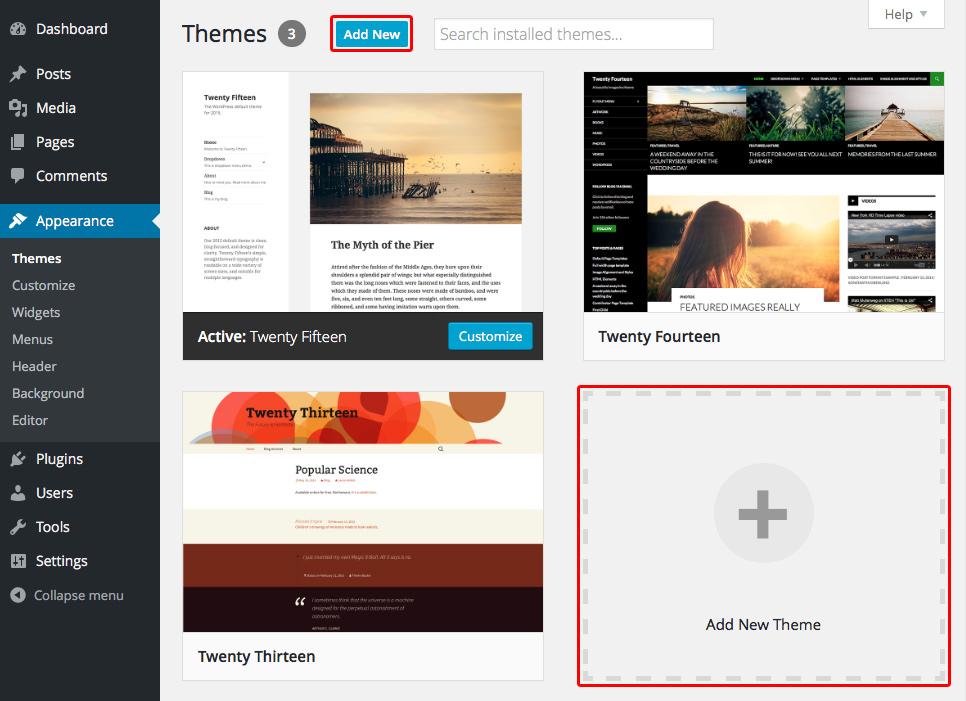
A. Installaing theme using Admin Panel
To install Sopphie, you must first locate the theme files. You can find these in the package you downloaded, in the zip file Sopphie.zip
- Navigate to Appearance > Themes.
- Click the Add New button.
- Click the Upload Theme button.
- Click the Browse... button and select the Sopphie.zip file you located earlier.
- Once installed, open the Themes page again, select the newly installed theme and click on the Activate button.
- Enjoy your new WordPress theme!
B. Installaing theme using cPanel
If your host offers the cPanel control panel, and the Theme files are in a .zip archive follow these instructions. Note: This assumes the Theme you download is a compressed (.zip) file containing a folder under which all the Theme files reside.
- Download the theme.zip file to your local machine.
- In cPanel File Manager, navigate to your Themes folder. If your WordPress is installed in the document root folder of your web server you would navigate to "public_html/wp-content/themes" and if you have WordPress installed in a sub-folder called WordPress, you would navigate to "public_html/wordpress/wp-content/themes".
- Once you've navigated to the Themes folder in cPanel File Manager, click on Upload file(s) and upload that .zip file you saved in Step 1.
- Once the .zip file is uploaded, click on the name of that file in cPanel, then in the panel to the right, click on "Extract File Contents", and that .zip file will be uncompressed.
- Follow the Selecting the Active Theme process from bellow.
C. Installaing theme using FTP(Manually)
To add a new Theme to your WordPress installation, follow these basic steps:
- Download the Theme archive and extract the files it contains. You may need to preserve the directory structure in the archive when extracting these files. Follow the guidelines provided by your Theme author.
- Using an FTP client to access your host web server, create a directory to save your Theme in the wp-content/themes directory provided by WordPress. For example, a Theme named Test should be in wp-content/themes/test. Your Theme may provide this directory as part of the archive.
- Upload the Theme files to the new directory on your host server.
- Follow the Selecting the Active Theme process from bellow.
Selecting the Active Theme
To select a Theme for your site:
- Log in to the WordPress Administration Panels.
- Select the Appearance panel, then Themes.
- From the Themes panel, roll over the Theme thumbnail image for the Theme you are interested in to see options for that theme.
- You can view more information about any theme by clicking Theme Details.
- A live preview of any Theme (using your blog's content) can be seen by clicking Live Preview.
- To activate the Theme click the Activate button.
After activating theme make sure to install required and recommended plugins.