Theme Options
Theme Options Panel is a place where you can control every aspect of your website with few button clicks. It is accessible from the "Creptaam Options" menu in your WordPress Dashboard.
Theme Options Basics
Each available option there is well described so you shouldn't have any problems with any of them.
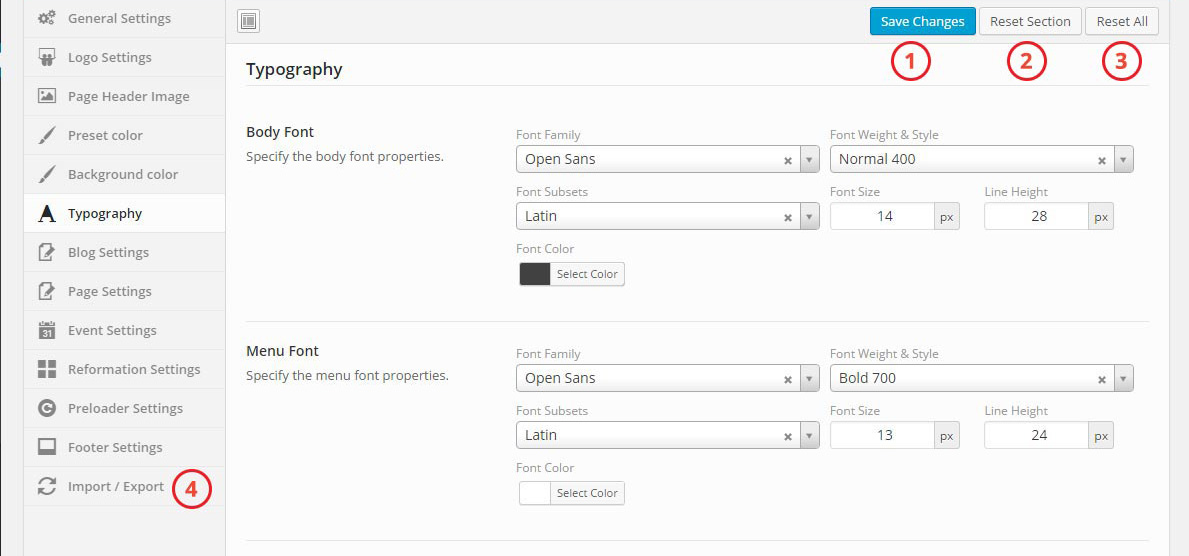
1. Saving Changes: After you have made some changes in the panel, please don't forget to click the "Save Changes" button located both in the bottom and top section of the panel.
2. Reset Section: If you like to make selected section is default then you can use this section.
3. Reset All: To reset all custom settings of Creptaam option then you can use reset all option.
4. Import / Export: If you want to backup your Creptaam option then you can use this tab. Just visit the "Import/Export" tab and follow the instructions. You can copy/download your current option settings. Keep this safe as you can use it as a backup.
After you download data file you can then load it anytime later or on a different site location (while migrating servers and so on).
Theme Options Details
- General Settings: In the general settings menu, you can show/hide page Breadcrumbs
- Logo Settings: From this logo settings, you can setup Normal and Retina screens logo. You can also manage logo by changing margin and padding from here.
- Header Settings: In the Header settings, you can manage Menu Style, Main menu margin option, Navbar padding option, Menu background color, Menu font color, Mobile menu background color, Mobile menu font color and Sticky menu visibility
- Header Topbar You can show hide menu top bar visiblity from here. You can also add app link, show hide Header Market Status, show hide Header soicial link
- Header CTA / SearchYou can show hide call to action button, button text from here. You can also show hide search button, background color from here.
- Page Header Image: In the Page Header Image section, you can manage Page header image, title color, background options.
- Preset Color: In the Preset color, you can manage, Body Background Color, Site accent color, Site link color
- Typography: In typography section, you can change almost all typeface, font-family, font-size, font-weight and line height of your website's text. In specifically you can change Body Font, Menu Font, Heading Font and all heading font sizes and line-height
- Blog Settings: From this Blog Settings, you can control, Blog page title, Blog sidebar setting, Post meta options, Share button, Blog pagination or Navigation.
- Page Settings: In the page settings menu, you can change page layout style. You can choose a page with "left sidebar" or with "right sidebar" or without any sidebr
- Preloader Settings: By this Preloader Settings menu, You can enable or disable page preloader
- 404 Page: In this menu sections, You can manage 404 page style, 404 text, 404 subtext, 404 Description and Button text.
- Marquee Price Settings You can show hide currency marquee bar from here. You also can change position, text color, background color and currency limit.
- Footer Settings: In this Footer Settings menu, You can manage Footer style, Footer copyright text, To top button style and Social icon visibility.
- Social Icons: In this section you can put social icon link for footer social area and topbar social area(if you show social icon in top bar)
- Import/Export: In this Sections, You can manage Import options and Export options.